
![]() Bluetooth signal strength
Bluetooth signal strength
![]() Device parameters have been edited but not yet sent to the device
Device parameters have been edited but not yet sent to the device
![]() New device parameters waiting for a connection to be sent to the device
New device parameters waiting for a connection to be sent to the device
![]() Device parameters need to be resynchronized on the next connection (e.g. after factory reset or firmware update)
Device parameters need to be resynchronized on the next connection (e.g. after factory reset or firmware update)
![]() Parameters are being synchronised between the device and the phone
Parameters are being synchronised between the device and the phone
![]() Battery level indicator for the device
Battery level indicator for the device
![]() Mirrors the activity indicator on Track (map) tab:
Mirrors the activity indicator on Track (map) tab:
![]() Waiting for instruction. Also indicates a device is Registered with the current active Finder
Waiting for instruction. Also indicates a device is Registered with the current active Finder
![]() Instruction in progress (only shown for Locate and Identify operations)
Instruction in progress (only shown for Locate and Identify operations)
![]() Instruction successful (only shown for Locate and Identify operations)
Instruction successful (only shown for Locate and Identify operations)


You can apply a profile from either the Profiles screen, or the Configuration screen for any device.
From the Configure Tag (or Finder) screen select the 3-dot menu at the top right and select Apply Tag Profile (or Apply Network Profile) to select your chosen Profile.
There are four buttons at the bottom of the screen:
CLOSE - Cancels any edited fields that are not saved/sent and closes the settings dialog after you confirm you want to discard the changes
SAVE - Saves the changes but doesn't commit them to the Tag. In the Devices Tab the symbol ![]() will be shown
will be shown
REVERT - this will revert any changes made (whether they are saved, unsaved or sent) as long as the device hasn't synchonised the changes at that time
SEND - This will save the changes and upload them to the Device as soon as it is next connected (immediately if the device is already connected). In the Devices Tab the symbol ![]() will be shown
will be shown

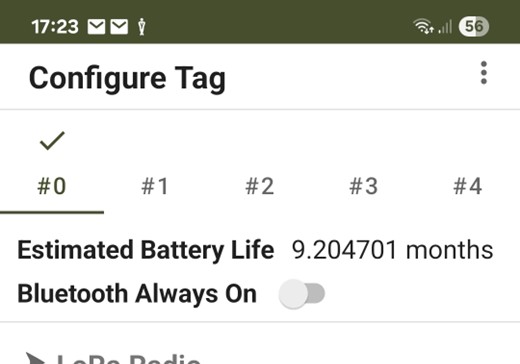
Banks
All devices support multiple versions of configurations through the use of 'Banks'.
Numbered #0 through to #4 (#0 is the 'Home' network) and shown at the top of the configuration screen, each bank is an independent set of configuration settings, the bank in use at any one time is referred to as the 'ACTIVE BANK' and indicated by a tick above the bank number. Press and hold any bank number to change that to the active bank.
Using Banks allows you to quickly change the configuration of a Tag or Finder by simply changing the Active Bank on a device. This is extremely powerful and changing Active Bank can also be done remotely using the 'Switch Config' menu option on the Track tab.
Important: Your Network Profile settings for a given bank must match the Network profile settings of the Finder you want to communicate with the tag (when the Tag is in FINDERDEVICE mode). Additionally, you can setup one or more banks for use with Private LoRaWAN networks using the LORADEVICE mode. This feature allows you to switch your tag from communicating with a Finder and a LoRaWAN Private Network and vice versa.