TagRanger®
How to perform a 'Locate'
A Locate involves remotely waking up your Tag and instructing it to get a GNSS location and send it back to you.
When performing a Locate try to do it from a high vantage point to maximise the operating range. During the process hold the Finder vertical and away from your body, keeping your hands away from the antenna.
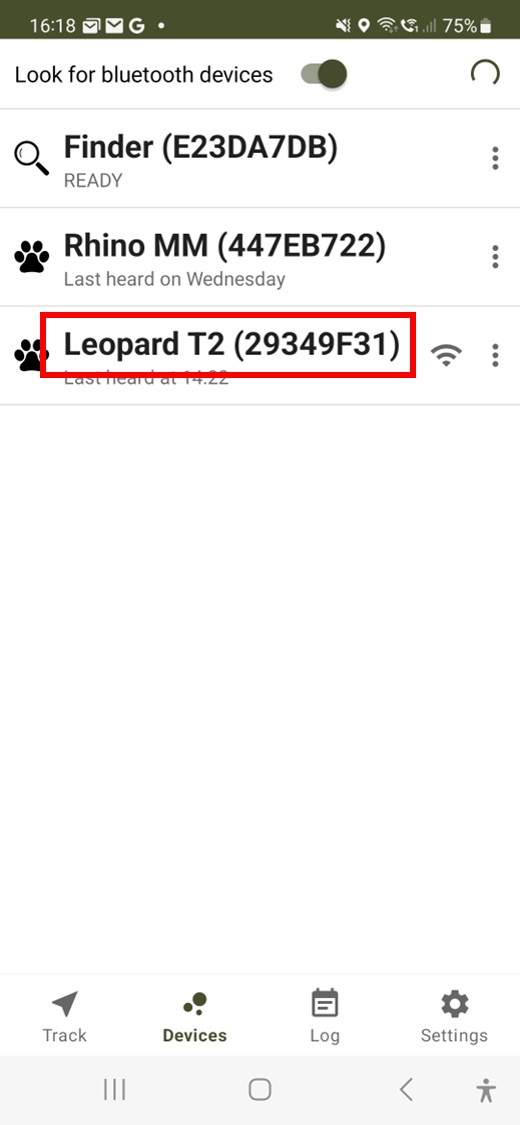
Tap on the name of the Tag you want to locate in the devices list. You will then get taken to the map page.
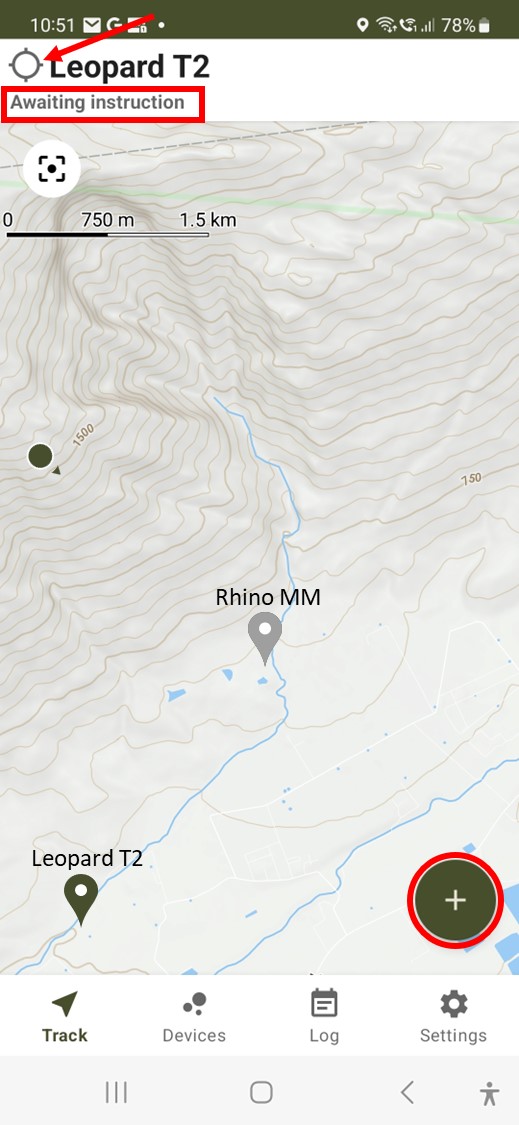
Your Tag is 'Awaiting Instruction' with the activity indicator stationary with a white centre.
Expand the menu and tap 'Locate'.
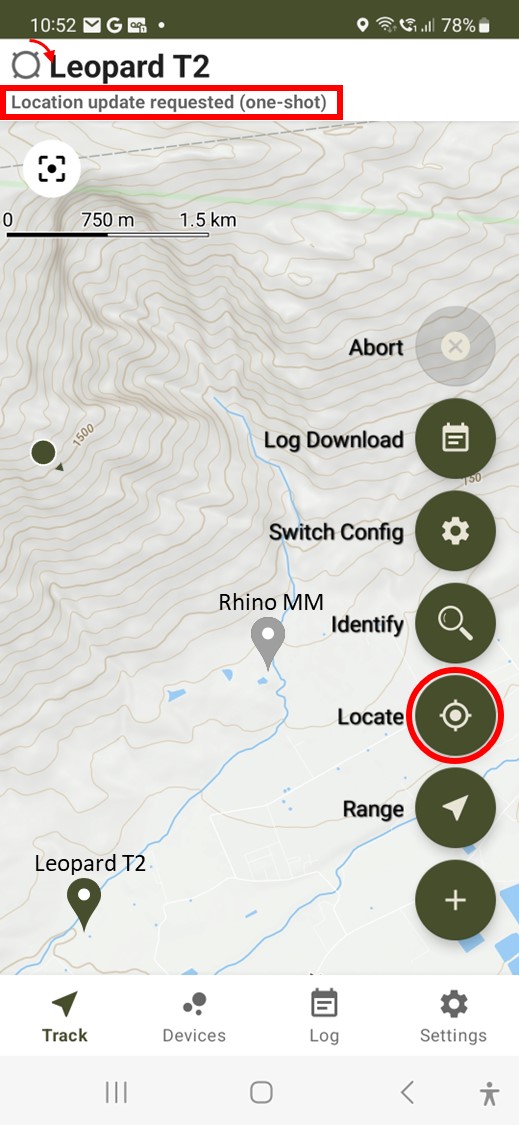
The activity indicator starts to spin to confirm the Location Update has been requested.
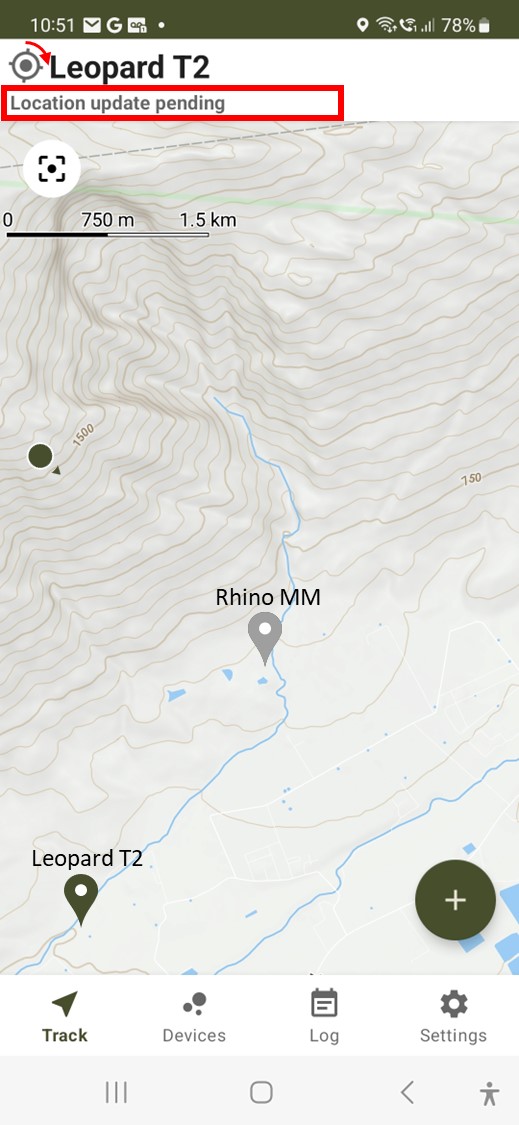
A black dot appears in the activity indicator to show the Tag has responded and is now trying to acquire a new GNSS position.
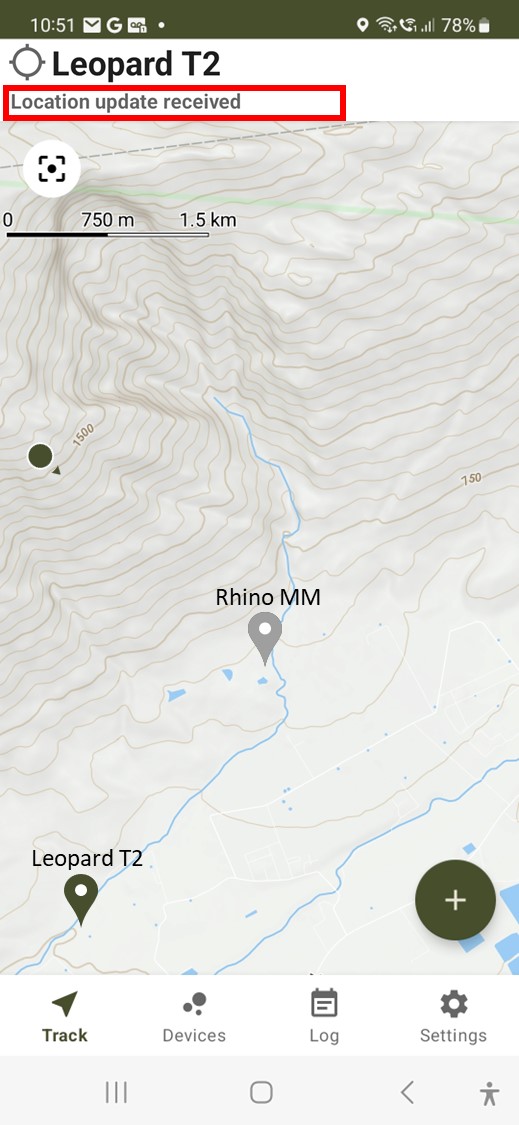
The activity indictor stops spinning and goes white. Location update confirmation is briefly displayed below the Tag name and the pin position is updated.
Notes:
- A Locate may be performed when attached to either a Finder or Relay Controller.
- If the Tag is out of range the "Location update request" phase will abort after about 20 seconds, the activity indicator will stop spinning and you will get a message saying "No response from location update request".
- If the Tag moves out of range during the "Location update pending" phase, the Finder will not receive the response and the App will time out aligned with the "GPS timeout" period (set in the Tag configuration), the activity indicator will stop spinning and you will get a message saying "Location update timed out".
- If the Tag cannot acquire a new GNSS location within the "GPS timeout" period (set in the Tag configuration), it will send the last valid location it has in it's memory with a message saying "Location not updated".
- Press and hold on the map pin will pop up a window showing the time of the last GNSS location.
- Due to the way the Tag wakeup works, it can take between 16 to 30 seconds for a message to the Tag to be confirmed depending on your setting for LoRa Wakeup Period.
- LoRaWAN limits the number of transmissions that may be made per hour depending on the Spreading Factor (SFnn) setting. With SF12 for example there is a limit of around 21 messages per hour and if you overuse the allocation, you will find you can be locked out until enough time has passed to restore the transmission time allowance. The App will warn you if you are starting to overuse the allocation, in which case wait a few minutes before trying further communications.
