TagRanger®
How to deploy a Relay
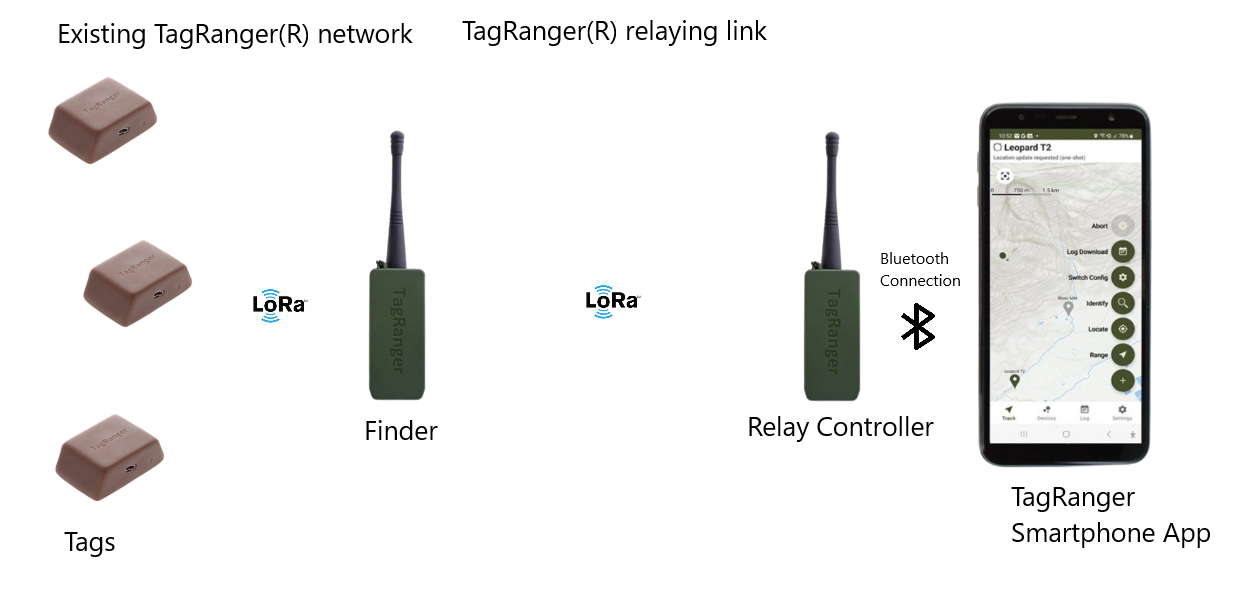
Deploying with a Finder & Relay offers the potential of vastly improved link range by utilizing a 2-hop relay communications scheme.
When using a Relay, the Finder will be deployed remotely either fitted to a drone or stationed at a fixed strategic location such as on a tethered balloon, mast or hilltop. From the point of view of any Tags deployed in the LoRaWAN network, the system appears and behaves identically to a system without a Relay. The main difference is that an additional relaying link is opened up between the Finder and Relay. This relaying link is what provides the increased communications range.

This guide assumes the user has already configured their Relay (i.e., applied the desired Network Profile) and paired it to the required Finder in readiness to deploy with the relaying link.

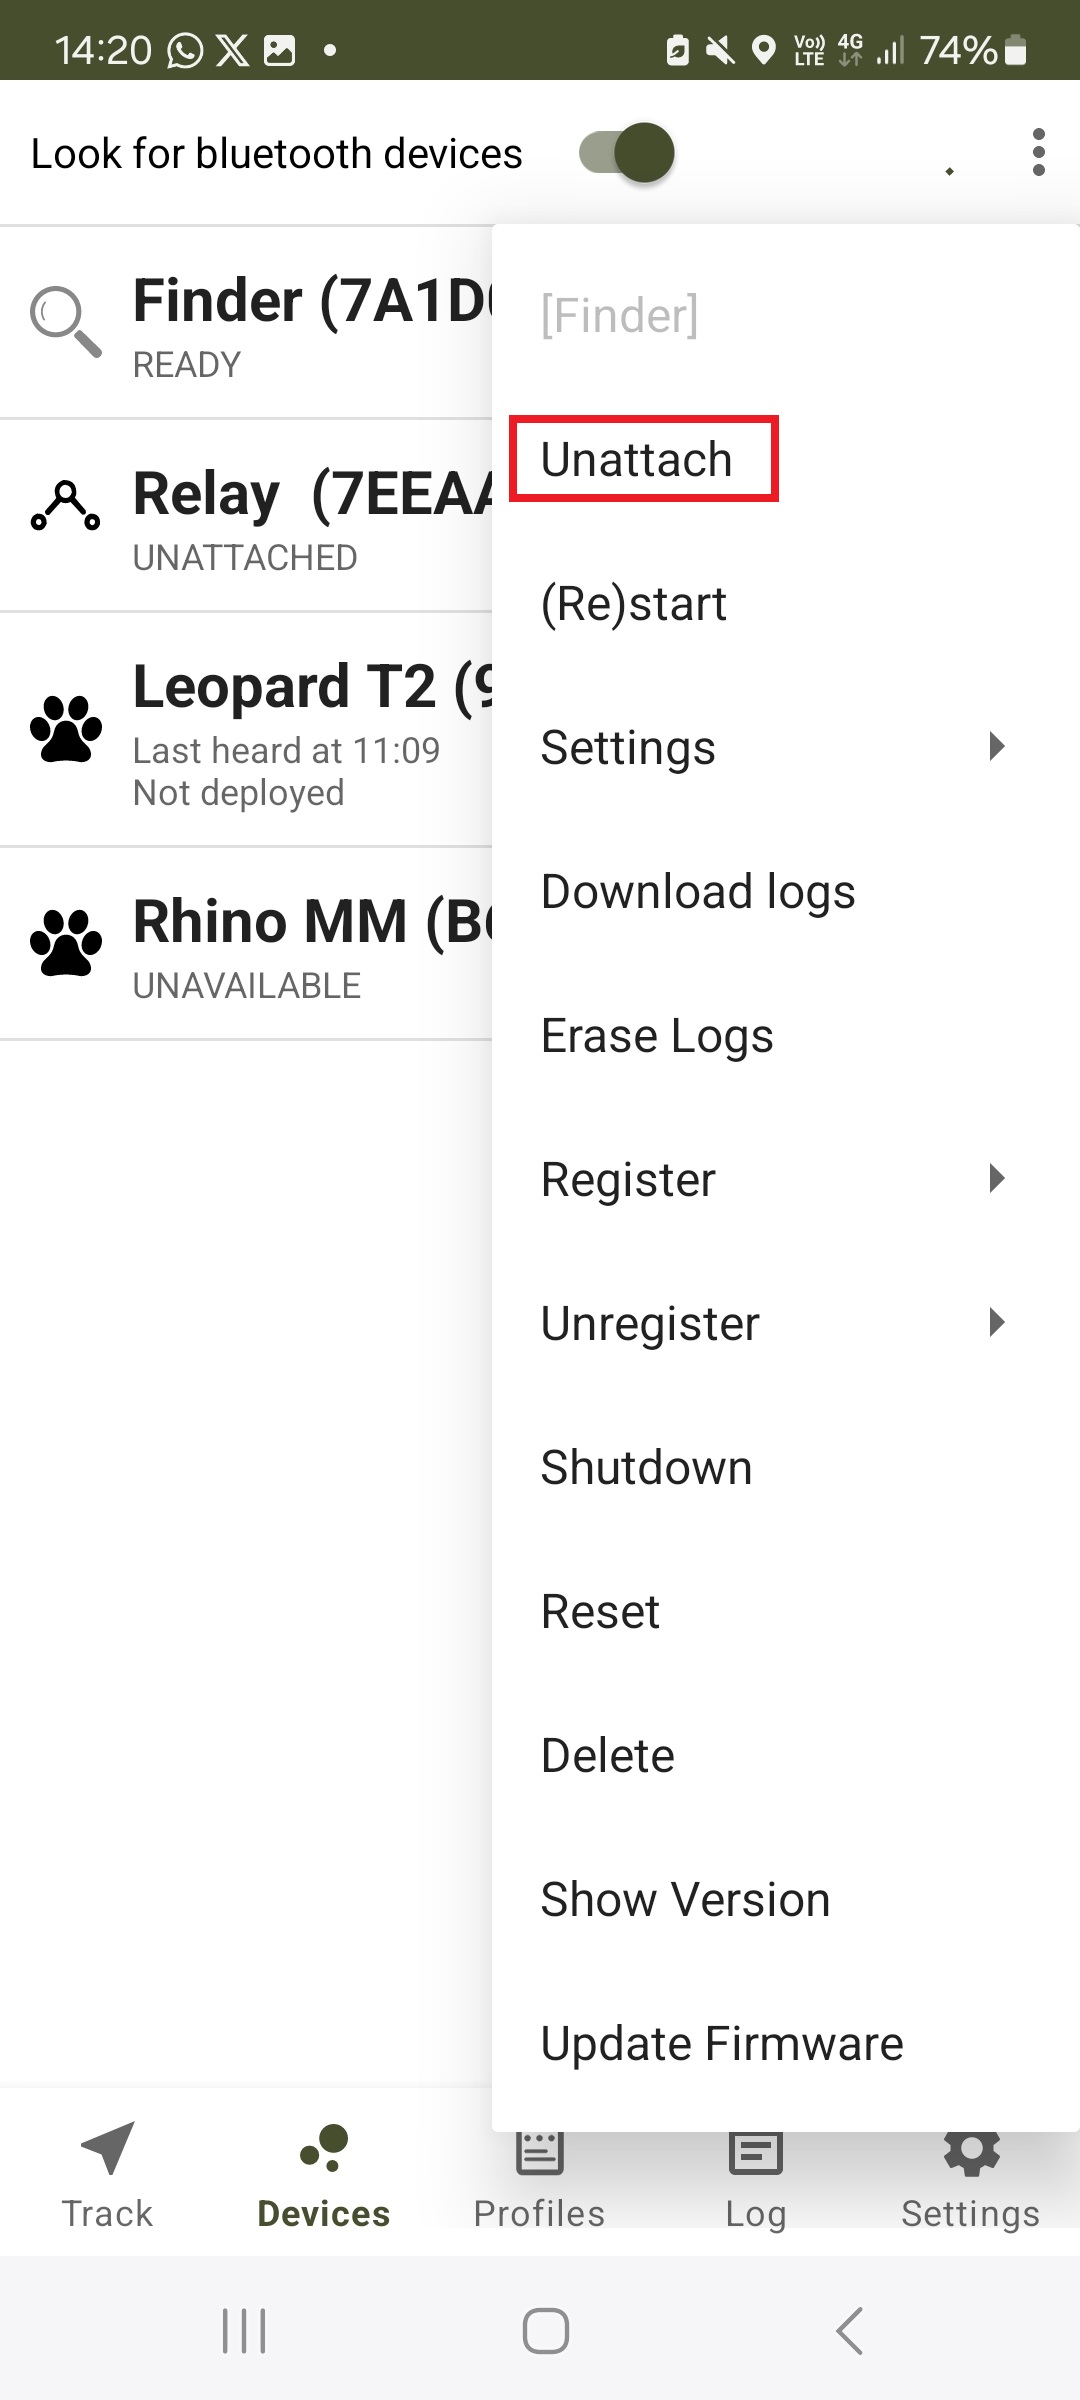
Power on and attach to the required Finder as normal. Once the Finder status indicates READY, click on the device's 3-dot menu and select the "Unattach" option. This will disconnect the smartphone application from the Finder whilst leaving the Finder running.

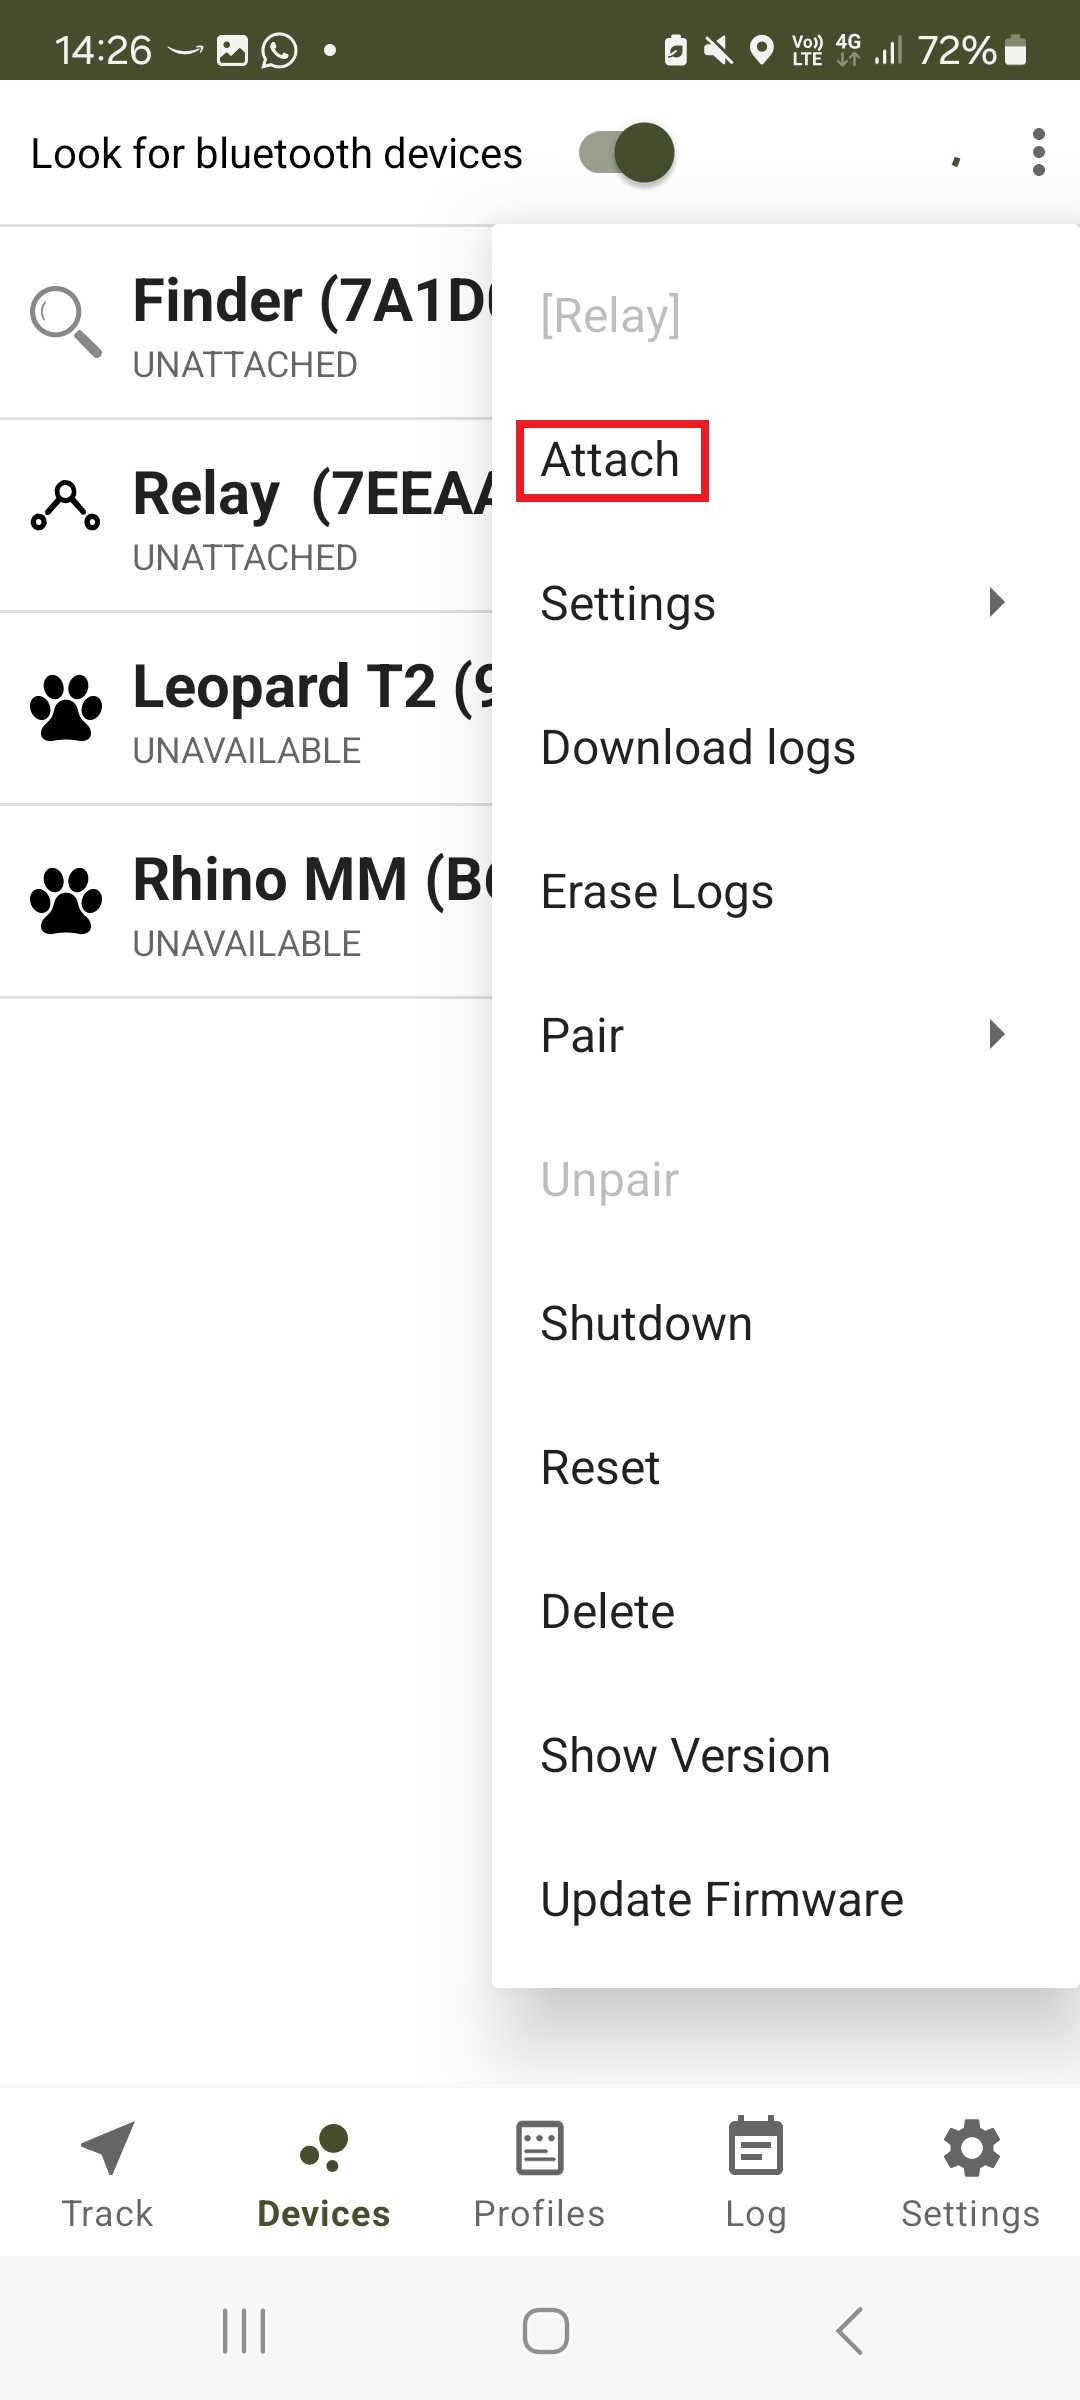
Now power on your Relay device and make sure the "Look for bluetooth devices" option is enabled. From the device's 3-dot menu, select the "Attach" menu option to attach to the Relay.

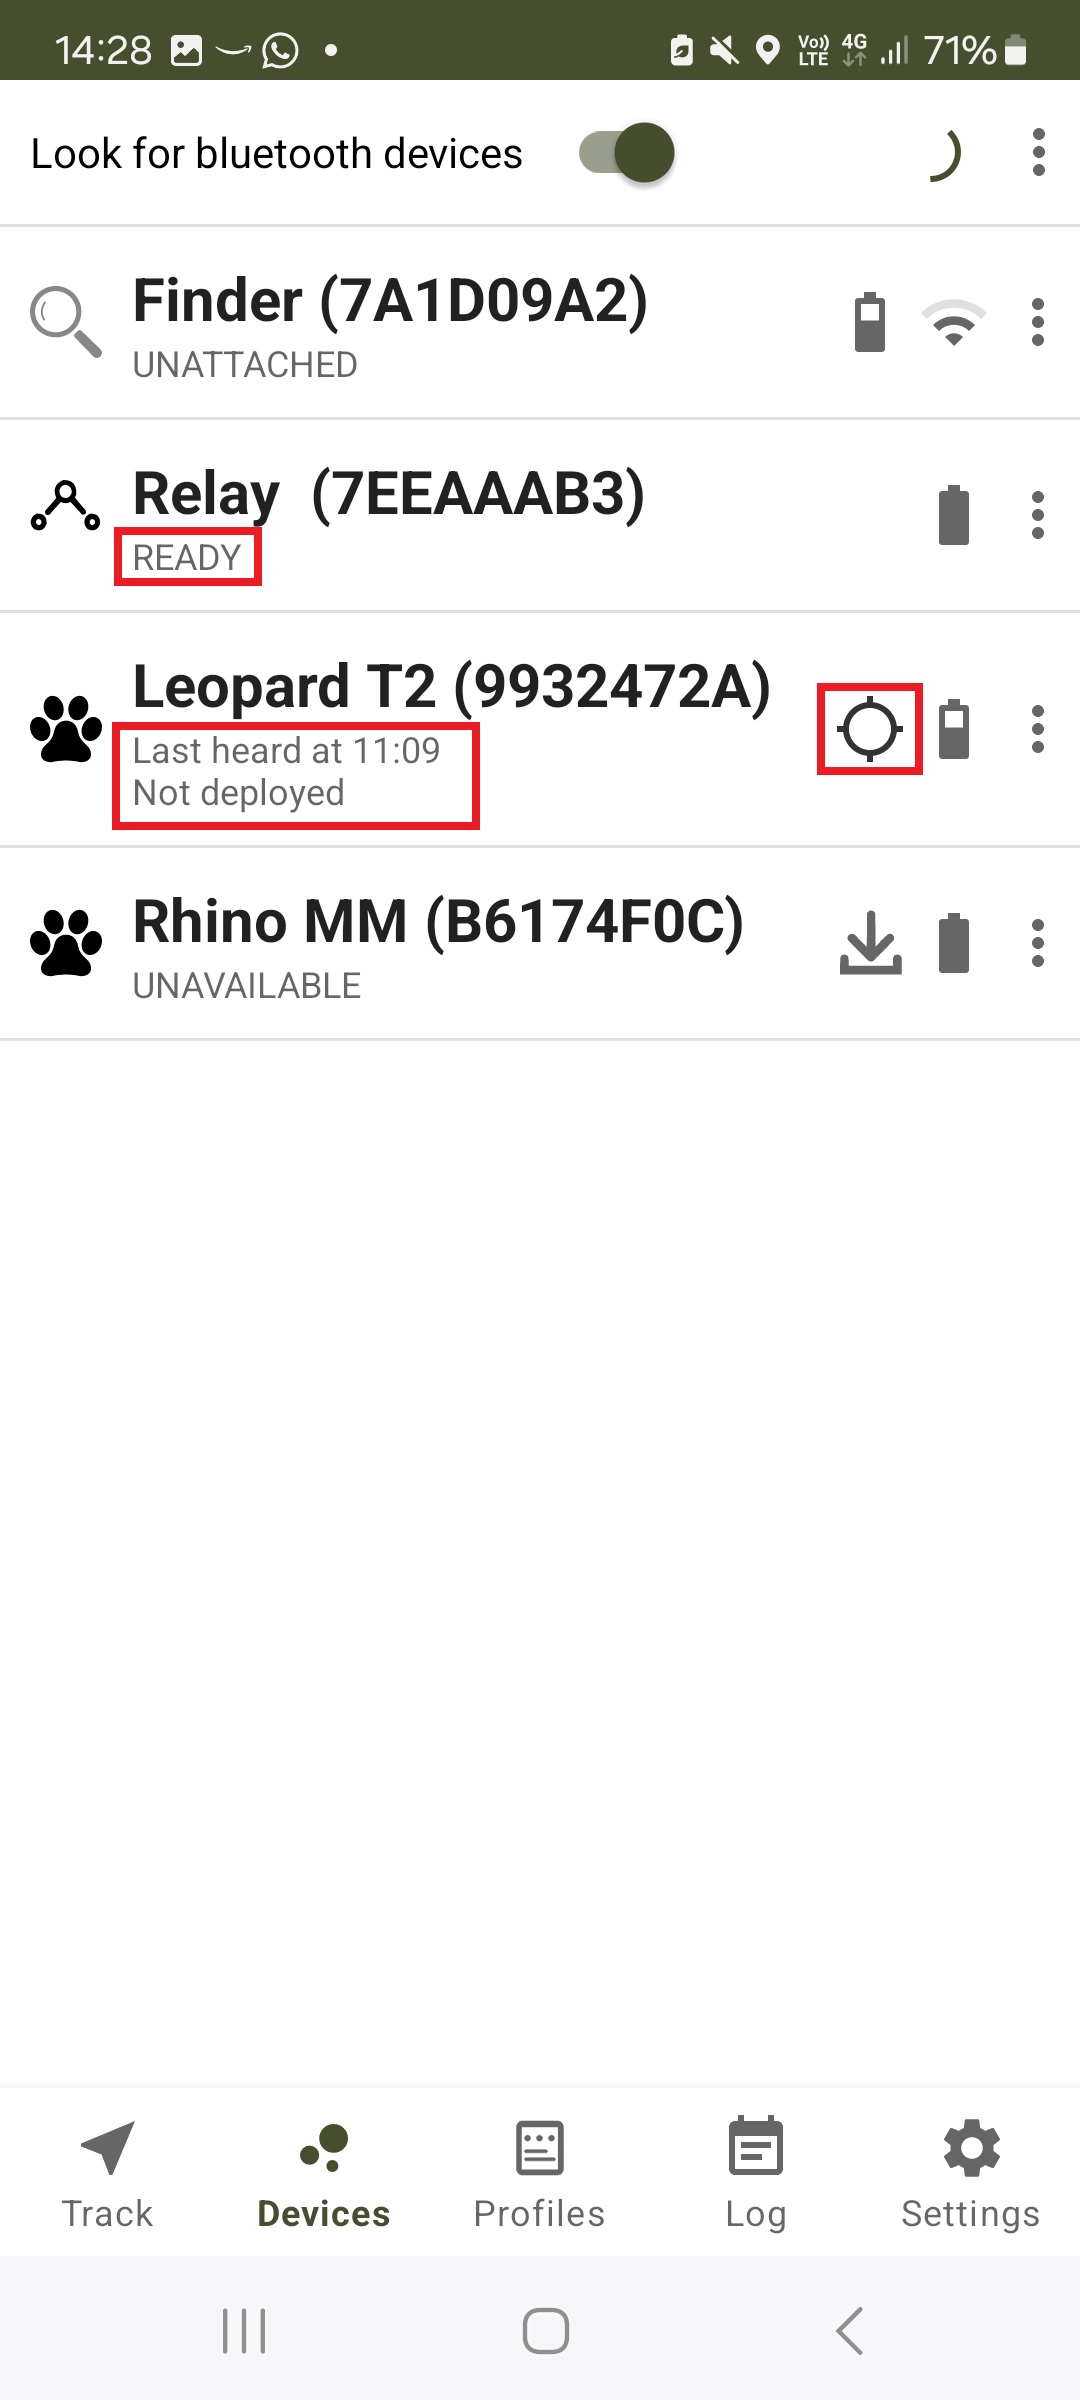
The Relay will go through its start-up sequence and the device status should indicate READY. Furthermore, any Tag devices registered to the paired Finder should now be available for use i.e., their device status should now no longer show UNAVAILABLE and the activity icon will appear.
Once the Relay is in the READY state, you can now refer to the other guides on How to perform a ‘Locate’ and How to perform a ‘Find’ to perform the locate and find operations respectively.
